


- MBT
How MBT Fittings Work: Function of Progressive Ring Fittings
The MBT progressive ring fitting produces a low to high pressure leak free connection of tubes and components in fluid systems. The basic function of the MBT progressive ring is the controlled progressive bite of the ring into the tube due to a unique internal geometry.
The front cutting edge has already started cutting into the tube before the second cutting edge starts. As soon as both cutting edges have cut the tube to the designed depth further advance is limited by the stop edge.
Owing to the design of both cutting edges and stop edge all forces arising are equally distributed. This distribution alone with the specially designed interior collar of the ring guarantees increased safety, particularly with regard to vibration and flexure stresses. The design and function of the progressive cutting ring ensure that service vibration loading is not present in the areas of the tubing where the bite is made.
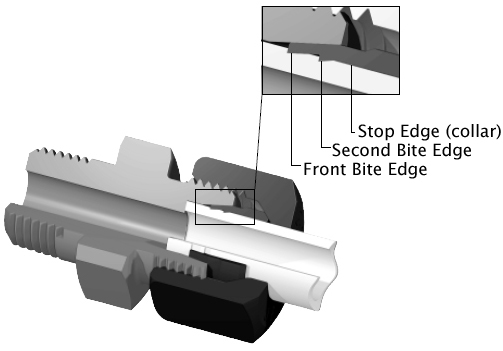 The stop edge causes a sharp increase in tightening forces which is clearly perceptible. After assembly, a visible collar of cut tube material
must completely fill the space in front of the first cutting edge. With stainless steel tube and hose connections made from free cutting steel,
the collar is less due to the harder material.
The stop edge causes a sharp increase in tightening forces which is clearly perceptible. After assembly, a visible collar of cut tube material
must completely fill the space in front of the first cutting edge. With stainless steel tube and hose connections made from free cutting steel,
the collar is less due to the harder material.During assembly, it is necessary that the tube is held firmly against the stop in the inner cone of the fitting; if not, the cutting process will not take place satisfactorily. Reassembly can be performed an unlimited number of times.
Preset of Progressive Ring
The MBT fitting requires a preset operation that creates a bite by the progressive ring into the outer surface of the tube. You can do this
manually with the fitting body.
Presetting with the fitting body is only recommended for steel and copper tubes.
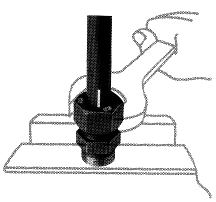
Steps for Presetting Using the Fitting Body
- Lubricate thread and cone of fitting body as well as the progressive ring and nut
threads.
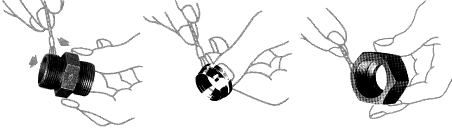
- Slip nut and progressive ring over tube, assuring that they are in the proper orientation.
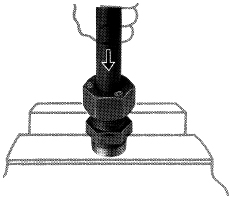
- Screw nut onto fitting body until finger-tight or light wrench resistance. Hold tube against the shoulder in the cone of the fitting
body.
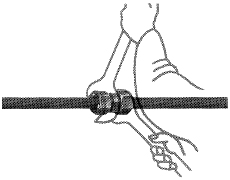
- Mark nut and tube in the finger-tight or light wrench resistant position.
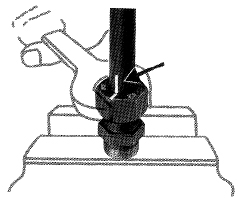
- Tighten nut 1½ turns. The tube must not turn with the nut. The stop edge in the progressive ring limits over tightening by sharply
increasing the tightening torque.
Preset Inspection
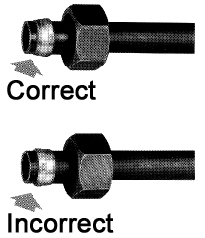
To inspect the preset, remove the nut and tube from the fitting and check if a visible collar fills the space completely in front of first
cutting edge. If not, tighten slightly more. It does not matter if ring can be rotated on tube end.

To install the preset tube assembly to the fitting body, wrench-tighten nut to wrench resistance (light wrenching). From this position, tighten nut another ¼ turn or 1½ flats of the nut. Another wrench must be used to prevent movement of the fitting body.
|
Policies
|
Shopping
|
Customer Service
|
Search by Part Number
|